
How to Frame Travel Posters for Living Room Walls
Table of Contents
- What You'll Need Before You Start
- Step 1: Measure Your Poster and Choose the Right Frame Size
- The Best Frame Styles for Vintage Posters in a Living Room
- How to Frame Travel Posters: Mounts, Glazing and Backing
- How to Protect Travel Posters from UV Damage
- How to Hang a Gallery Wall of Travel Prints
- Common Mistakes to Avoid When Framing Travel Posters
- Frequently Asked Questions
Last Updated: 10 September 2026
What You'll Need Before You Start
When you frame travel posters properly, it takes about 30 minutes and a handful of basic supplies, but the choices you make before you start determine how the finished piece looks on the wall. This guide from Pitch Black Print walks through the full process, from measuring the print to hanging the final frame.
Gather these items first:
- A tape measure and a pencil
- A clean, lint-free cloth
- Acid-free backing board or foam board
- Picture-hanging hooks rated for the frame's weight
- A spirit level
- A screwdriver or small hammer, depending on your hanging hardware
If your poster arrived rolled, lay it flat under a couple of heavy books for a few hours before framing. Curled paper never sits straight behind glass, and forcing it into a frame can crease the print along the edges. A common mistake is skipping this step and blaming the frame when the poster still looks wavy.
Step 1: Measure Your Poster and Choose the Right Frame Size
Measure the poster's exact width and height in millimetres, then decide whether you want a mount around it. A mount adds visual breathing room and protects the print's edges from touching the glazing.
For a poster requiring a frame measuring approximately 711x1016mm (28x40 inches) with a mount, the original poster would be around 610x914mm (24x36 inches). Adding a 50mm (2-inch) mount requires a frame measuring 711x1016mm (28x40 inches) to keep the proportions balanced, according to framing size guidance for large art displays. The same logic scales down: a smaller poster with a proportionally similar mount border will look just as considered.
| Poster Size | Mount Width | Frame Size Needed |
|---|---|---|
| A3 (297 x 420mm) | 50mm | 397 x 520mm |
| A2 (420 x 594mm) | 50mm | 520 x 694mm |
| 24 x 36 inch | 2 inch | 28 x 40 inch |
Skip the mount if you want a tighter, more graphic look, but size the frame to the poster exactly. A frame that's even a few millimetres too large lets the print shift behind the glazing over time.
The Best Frame Styles for Vintage Posters in a Living Room
Thin black metal or pale natural wood frames suit vintage travel prints best, because they hold the artwork without competing with it, as noted in framing guidance for travel prints. Travel posters are graphic objects, and ornate gold frames work against that graphic quality rather than enhancing it.

Matching Frames for a Curated Look
Three posters in identical frames create rhythm and order on a living room wall, a styling approach that has become a defining wall art trend for 2026, according to Wall Art Trends 2026. Match the frame finish across the set, then match the frame colour to your existing furniture or room accents so the group reads as one considered display rather than three separate purchases.
Deliberately Mismatched Frames for an Eclectic Feel
Mismatching frames on purpose gives a collected, lived-in look, as recommended in travel poster styling advice. Choose two or three finishes that share a common tone, such as black, oak, and warm white, and repeat them across the wall so the mix still feels intentional.
How to Frame Travel Posters: Mounts, Glazing and Backing
Archival, acid-free materials are the standard recommendation for framing travel posters, since ordinary cardboard and acidic paper slowly discolour prints over time, per poster framing material guidance. Wood, metal, and modern composite frames are all suitable; the material matters less than what sits behind the print.
Work through the layers in this order:
- Clean the glazing on both sides and let it dry fully.
- Place the poster face-up on the backing board.
- Add the mount on top, aligning the aperture with the print.
- Secure the layers with acid-free tape or framing points.
- Seal the back with backing paper to keep dust out.
Glass or Acrylic for Large Poster Frames?
Acrylic is lighter and safer for large frames, which matters if you're hanging above a sofa or in a rented property where you can't drill heavy fixings. Glass offers slightly better clarity but adds significant weight at larger sizes.
For anything above A2, acrylic is usually the more practical choice. It resists shattering, travels better if you move home, and puts far less strain on your hanging hardware.
How to Protect Travel Posters from UV Damage
UV light is the main cause of fading in framed prints, and it works slowly enough that most people don't notice until the damage is done. Direct sunlight on a south-facing wall can visibly dull colours within a couple of years.
Use glazing with a UV-filtering coating, and keep framed posters off walls that receive hours of direct sun. Rotating your display every year or so spreads the exposure evenly across your collection. If you're framing a piece you plan to keep for decades, UV-filtering glazing is worth the extra cost.
How to Hang a Gallery Wall of Travel Prints
Plan the layout on the floor first, then transfer it to the wall. Mark the centre point of your display, work outward from there, and keep the gaps between frames consistent, usually 50-75mm for a tight, gallery-style arrangement.
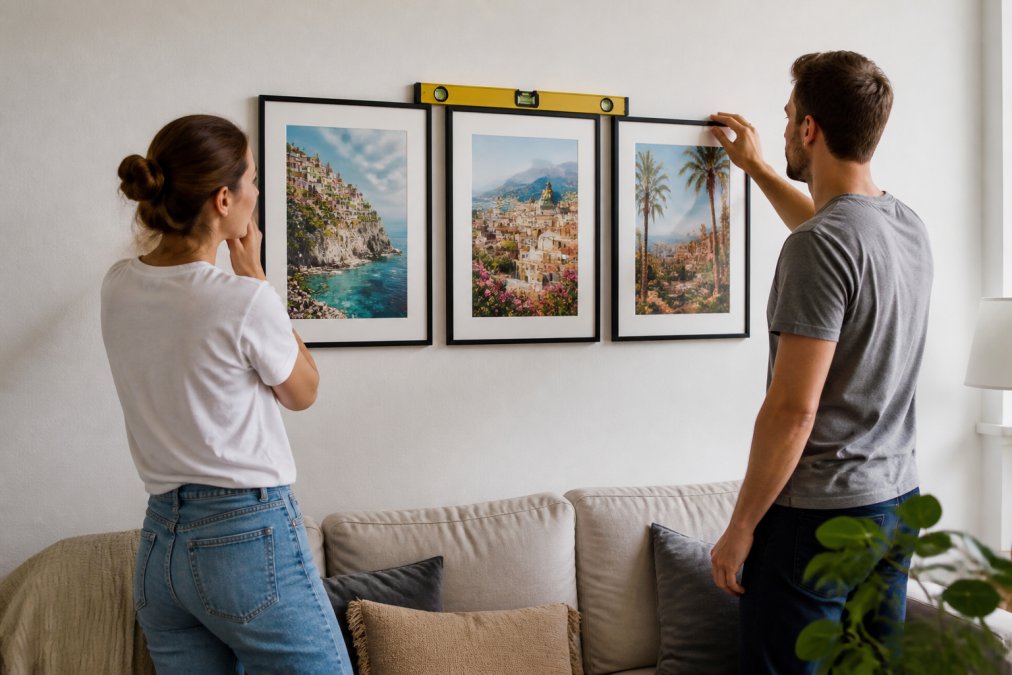
Hang the centre frame first and level it before moving to the outer pieces. Use two hooks per frame for anything wider than A3, spaced roughly a third of the way in from each side, so the frame can't tilt over time.
For a gallery wall of travel prints, the spacing between frames matters as much as the frames themselves. Uneven gaps are the fastest way to make an expensive-looking display read as messy.
Common Mistakes to Avoid When Framing Travel Posters
The most frequent error is framing a poster without any mount, which leaves the print pressed against the glazing and at risk of sticking or condensation marks. A mount costs very little and prevents both problems.
Other mistakes worth avoiding:
- Using acidic backing board, which yellows prints over time
- Choosing an ornate frame that fights the poster's graphic style
- Hanging above eye level, which forces you to look up at the artwork
- Skipping UV protection on sun-facing walls
- Measuring the frame before the poster has flattened out
Framing a travel poster well comes down to a few deliberate choices: the right mount, UV-filtering glazing, and a frame finish that lets the artwork lead. At Pitch Black Print, our original destination prints come as poster-only or with professional framing in black, white, or oak, so you can match the finish to your living room without hunting for a framer. Every order includes free worldwide shipping and a 14-day return policy. Get started with Pitch Black Print and bring your travel memories home in a frame that does them justice.
Frequently Asked Questions
Should travel posters be framed with or without a mount?
A mount creates breathing space between the artwork and the frame, which suits travel posters because the graphic needs room to stand out. For a 610x914mm (24x36 inch) poster, adding a 50mm (2-inch) mount means you need a 711x1016mm (28x40 inch) frame to keep the proportions right (Modern Memory Design, 2026). Without a mount, the poster fills the frame edge to edge, which can look cramped. If you are framing a busy destination scene, use a mount; if the design already has a wide border, skip it.
What is the best frame style for vintage-style travel posters?
Thin black metal or pale natural wood frames work best because they complement the artwork without competing with it (Gemarkt, 2026). Ornate gold frames are discouraged for travel posters since these are graphic objects that should be framed like graphics. For a cohesive living room look, match your frame finish to existing furniture or room accents (Prints of Places, 2026). If you want a curated gallery feel, keep all frames identical; for an eclectic, collected look, deliberately mismatch them (About Wall Art, 2026).
How do I arrange multiple travel posters on a living room wall?
A triptych of three posters in matching frames adds rhythm and order to a living space (Instagram Wall Art Trends, 2026). Hang them in a row with equal gaps of 5-8 cm between frames. Centre the group at eye level, roughly 145-150 cm from the floor to the centre of the middle poster. For larger collections, create a grid of two rows of three, keeping the spacing consistent. Always lay the arrangement on the floor first to check balance before making any holes.
How do I prevent travel posters from buckling in the frame?
Buckling happens when paper expands and contracts with humidity. Use archival, acid-free materials and avoid tight-fitting frames that pinch the paper (Modern Memory Design, 2026). Add a backing board behind the poster and use acid-free hinging tape at the top edge only, allowing the paper to hang freely. Keep framed posters away from radiators, direct sunlight and damp walls. In a living room, a spot above a sofa is usually safer than next to a window or door where draughts and moisture vary.