
How to Create a Travel Gallery Wall: 2026 Guide
Table of Contents
- What You'll Need Before You Start
- Step 1: Choose a Cohesive Theme for Your Travel Gallery Wall
- Step 2: Pick an Anchor Piece and Build Around It
- Step 3: Find Affordable Travel Art for Home Without Compromising on Quality
- Step 4: Learn How to Mix Photos and Art in a Gallery Wall
- Step 5: Use Gallery Wall Layout Templates to Plan Your Arrangement
- Step 6: Hang Your Travel Gallery Wall Without Damaging the Wall
- Common Mistakes to Avoid
- Frequently Asked Questions
Last Updated: September 11, 2026
What You'll Need Before You Start
A travel gallery wall is a curated arrangement of framed prints, posters and photographs from your trips, hung together as a single visual display rather than scattered across separate rooms. This guide from Pitch Black Print walks through the full process, from choosing a theme to hanging the final piece without wrecking your plaster.
The single biggest mistake is buying frames before you know your layout. Gather these first:
- Painter's tape for marking positions on the wall
- A tape measure and spirit level (a laser level saves time)
- Picture hooks rated for your frame weight, or adhesive strips for rented walls
- Brown paper or newspaper to cut paper templates the size of each frame
- A pencil for marking hook positions
- Your prints, framed or unframed
Renters should note that adhesive strips work well for lightweight, unframed prints, while anything over roughly 2kg needs a proper hook. If you're unsure, check the weight rating on the packaging before you commit.
Step 1: Choose a Cohesive Theme for Your Travel Gallery Wall
Pick one unifying thread, not a random collection of holiday snaps. Cohesion comes from a shared colour palette, a single region, a consistent art style, or a recurring subject like coastal towns or capital cities.
The most common failure here is mixing a minimalist line drawing with a saturated retro poster and expecting them to sit comfortably together. They won't. Choose a lane:
- By destination: all one country or city
- By palette: navy, amber and cream across every piece
- By style: vintage travel poster, paper-cut, or fine line art
- By format: uniform frame sizes in a strict grid
A travel gallery wall works best when it reads as one collection rather than a jumble of souvenirs. Decide the thread before you buy a single frame.

Step 2: Pick an Anchor Piece and Build Around It
Start with one large focal print, then add smaller supporting pieces around it. Designers recommend a single 91x61cm anchor from a signature trip, supplemented by four to six supporting pieces in 61x41cm or 41x30.5cm sizes (Fattrol travel gallery wall guide).
As interior designer Emily Henderson puts it:
"Start by placing your biggest pieces first, and build around them. So your eye travels around the gallery wall, rather than slamming straight into it." -- Emily Henderson, Style by Emily Henderson (2026)
Your anchor should be the trip that means the most, not the one that photographs best. For a London collection, a bold Tower Bridge London Poster, Paper Cut Art Print at £14.99 carries enough visual weight to hold the centre, with its layered purples and burnt oranges giving smaller pieces a palette to echo.
Step 3: Find Affordable Travel Art for Home Without Compromising on Quality
Affordable travel art for home doesn't mean thin paper and washed-out colour. The trick is buying unframed prints and framing them yourself, which typically costs less than half of what a pre-framed piece runs.
Three ways to keep costs down without dropping quality:
- Buy poster-only and use standard high-street frames
- Stick to one size across supporting pieces to simplify framing
- Mix one anchor with several smaller prints rather than six medium ones
Pitch Black Print offers a choice of poster-only or professional framing in black, white or oak, so you can match an existing frame collection or start fresh. Every order includes free worldwide shipping and a 14-day return policy, which removes the guesswork if a colour reads differently on your wall than on screen.
Step 4: Learn How to Mix Photos and Art in a Gallery Wall
Knowing how to mix photos and art in a gallery wall comes down to weight and repetition. Pair one heavy, saturated art piece with two or three lighter photographs, and repeat one element, such as frame colour or a shared border, to tie them together.
A workable ratio for most walls:
| Element | Recommended Mix | Why It Works |
|---|---|---|
| Anchor art print | 1 piece | Holds visual weight |
| Supporting art prints | 2-3 pieces | Echoes the anchor's palette |
| Personal photographs | 2-4 pieces | Adds authenticity |
| Unframed extras | 1-3 items | Postcards, maps, tickets |
Mixed-media displays that blend postcards, maps and photography create a collected rather than uniform look, according to discussions among solo travellers (r/solotravel gallery wall discussion). Keep frame colour consistent across the mix, and let the content do the varying.
Step 5: Use Gallery Wall Layout Templates to Plan Your Arrangement
Gallery wall layout templates are pre-set arrangements, such as a grid, a salon-style cluster or a symmetrical row, that tell you where each frame goes before you touch the wall. Sketch your chosen template on paper at scale, or cut paper templates the exact size of each frame and tape them up.
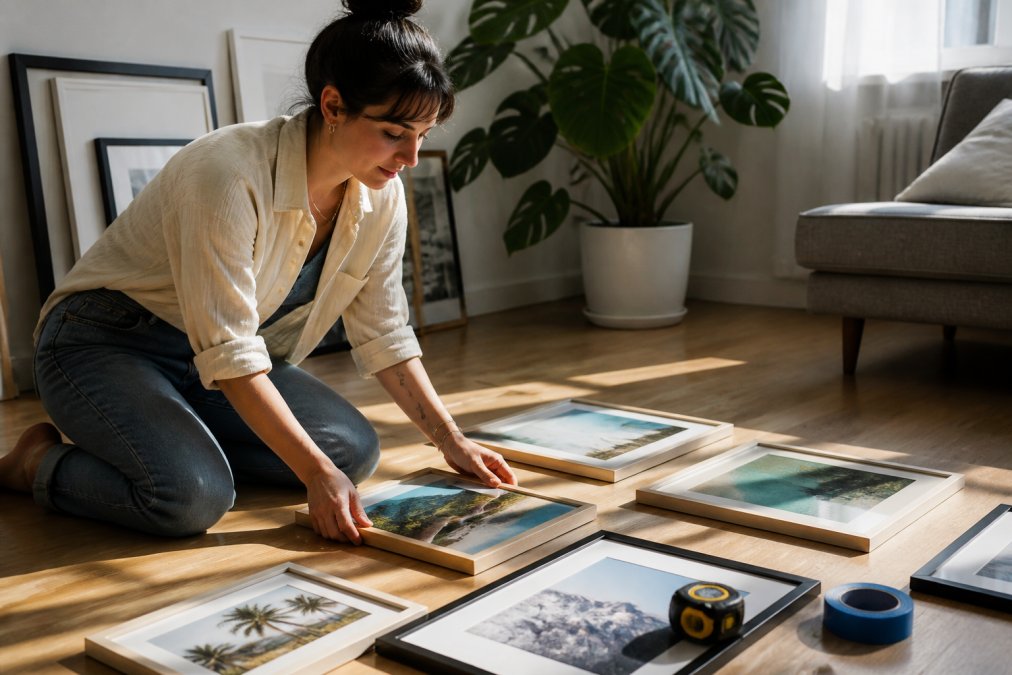
Test the arrangement on the floor first. A common mistake is committing to hook positions before checking how the pieces read together at actual size.
Three templates cover most walls:
- Grid: uniform sizes, even gaps, best for renters and small spaces
- Salon: one anchor plus mixed sizes, best for high ceilings
- Linear row: a single horizontal line, best above a sofa or desk
Step 6: Hang Your Travel Gallery Wall Without Damaging the Wall
Hang the centre of your arrangement at roughly 145cm from the floor, which places the midpoint at average eye level (Inka Arthouse gallery wall sizing rules). Mark this line first, then work outward from your anchor.
Keep a consistent 10-25mm gap between frames for a cohesive finish (Fattrol travel gallery wall guide). Inconsistent spacing is the fastest way to make a carefully planned wall look accidental.
For rented properties, adhesive strips handle unframed lightweight prints, while framed pieces need hooks. Measure twice, mark once, and step back after every second frame to check alignment.
Common Mistakes to Avoid
The recurring errors are predictable. Spacing frames unevenly, skipping the anchor piece, and mixing incompatible styles all undo good planning.
- No anchor: a wall of same-sized prints has no focal point
- Inconsistent gaps: varying spacing reads as careless
- Too high: anything above eye level strains the neck
- Mixed styles with no thread: minimalist line art beside saturated retro posters clashes
- Buying frames first: you'll end up with sizes that don't fit your layout
Aim for a wall that feels collected rather than uniform. The rigid grid isn't the only answer, and a slightly organic arrangement often reads as more personal.
Frequently Asked Questions
How do you arrange a travel gallery wall so it looks cohesive?
Start by choosing a consistent colour palette or theme across all pieces. Use one large anchor print, such as a 91x61cm poster, then add 4-6 smaller pieces in 61x41cm or 41x30.5cm sizes. Keep frame spacing consistent at 10-25mm between each frame. Hanging the centre of the arrangement at roughly 145 cm from the floor also helps it feel intentional and balanced.
What is the best way to mix travel photos with art prints?
Mix them by scale and style rather than keeping them separate. Place your largest art print as the anchor, then intersperse smaller photos around it. Use the same frame colour or finish across both photos and prints to tie them together. A consistent gap of 10-25mm between frames keeps the arrangement from feeling cluttered, even when you are combining different media.
Should a gallery wall be symmetrical or eclectic?
Both work, but they suit different spaces. A symmetrical grid layout feels calm and ordered, which works well in hallways or above a sofa. An eclectic, collected arrangement feels more personal and is better for a travel theme where pieces come from different trips. If you are unsure, start with a loose grid and adjust as you add pieces.
How do you hang a gallery wall without damaging the plaster?
Use adhesive picture hooks rated for the weight of your frames, especially if you rent. For heavier pieces, choose narrow picture hooks that leave small holes you can fill easily. Always mark your layout on the wall with painter's tape first so you only make holes once. If you are renting, check your tenancy agreement before hanging anything.
Building a travel gallery wall takes an afternoon of planning and a wall worth committing to. Pitch Black Print specialises in original destination artwork, with free worldwide shipping, a 14-day return policy, and a choice of poster-only or professional framing in black, white or oak. Start with your anchor piece, build the palette around it, and let the wall bring your trips home. Get started with Pitch Black Print and turn a blank wall into a record of everywhere you've been.